What small project can you sew quickly and easily with your current skills and how much time are you prepared to spend learning something new?
Do you have a place where you keep items that need mending, altering, upcycling or fabric that’s waiting for the right project to come along?
Well now is that time! Here we will go through how to set up to sew regularly and through this you will build up your sewing skills and become more confident with the sewing projects you are prepared to take on.
What is a small sewing project?
The answer to this partly depends on your skills and the items you have that need working on!
Most homes have something that needs a button sewn on, a seam that needs to be sewn up or let out, hems to take up or let down. Is there a cushion cover you would like to make or other small soft furnishing projects or perhaps a fun bag or handmade gift you would love to tackle?


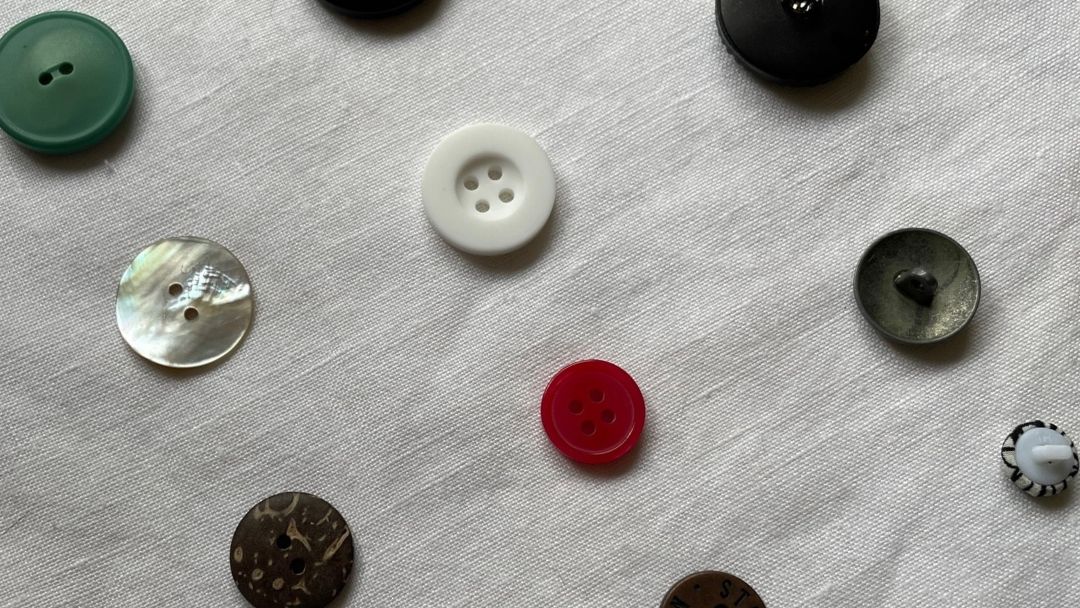
Mending and upcycle with buttons
Consider your sewing skills and what you have ready to be sewn and look for:
- An item to mend or upcycle eg replace buttons on a garment or re-create a garment or combine garments to upcycle
- An alteration project eg take up a hem, mend a seam, add a trim or refit a garment by adjusting seams/darts.
- A small item to sew eg fun tea towel or place mats, make a drawstring bag or a cushion cover or tote bag with pockets.

Handmade lemon print tea towel

Handmade cushion covers with tie closures
Such personality infused into these homes with fun handmade sewing projects.
STEP #1: Prepare for each project and assemble what you need.
Now that you have chosen the 3 projects you will work on, there is some preparation to take care of at the start that will speed up the sewing process.
Are you aware of the different sewing and pattern terminology?
A good place to start is with your sewing machine manual and I recommend having this to refer to. You can usually download these if your machine doesn’t have one.
When it comes to patterns a variety of symbols are used, dashes and dots, as well as written information. If you are not at this stage tackle something that doesn’t require a pattern, or a very basic pattern that doesn’t have a lot of markings to follow!
Do you have everything you need for this project in your sewing kit or do you need to get haberdashery (often shortened to habby) such as thread, buttons, hand sewing needles. Is your machine set up and working, and do you have a piece of fabric for test sewing?
Research on Pinterest for inspiration on colours, shapes, latest trends – yes, they exist for mending and alterations as well as small projects! So inspiring. I can spend hours looking at the creativity to be found in buttons, pockets, and small features to add to upcycle your garments!
Don’t underestimate the effect of simply adding a trim to your sewing project. By trim I mean decoration eg adding wide cotton lace to a hem to lengthen it.
Lovely post by Studio Faro about selecting trims https://www.instagram.com/studiofaro/

To save time make sure you start a shopping list of things to get for each project, so you are not making unnecessary trips to the shops. PS read STEP #4 to make sure you have all you need covered!
STEP #2: Understand your fabric and how it handles
Terminology – again! Yes, fabric does have its own language too! It is exciting though so don’t be overwhelmed, you will pick this up with experience.
What you must know is what sort of fibre your fabric is made from and what is its structure. For example, is it a cotton or a polyester and is the fabric woven or knitted?
I hope you can see on the image below – left is written woven and right shows the fibre is 100% cotton. Get into the habit of reading fabric labels even on readymade garments! Polyester being one of the most detrimental fabrics to our planet.


As a beginner I strongly recommend starting with 100% cotton that has been woven. Woven cotton is made in a variety of colours and prints and easy to sew. Op shops are a good place to find cotton garments to experiment with and learn alteration and upcycling techniques.
Once you know your fabric content and how it is constructed you will select the appropriate needle and thread for your machine. Save any off cuts to test your machine settings and do some stitch tests before you start working on the actual item.
Make a note of any problems you find with the fabric. Is it easy to cut and sew or do you need to make allowances for how to handle it?
Very important to consider is does your fabric need to be pre-shrunk before you cut. Cotton as well as other natural fibres can shrink and an end garment that doesn’t fit through shrinking in the wash can be enough to put you off sewing!
Take measurements carefully. If you are measuring yourself, be sure you know how to take body measurements (link here), and always double check you are cutting out according to instructions given.

STEP #3: About your machine overview
Once you have established a permanent (I hope) space to call your own for your machine, the next thing to consider is safety. Ensure there are no electrical leads that could trip you up, do you have an ergonomic chair and is your lighting appropriate? The same considerations apply to your hand sewing space.
On your test fabric check and test the following:
- Presser foot (not the same as the foot control!) and needle
- Stitch length
- Seam finishes eg zigzag
- Threading – the most common place to cause frustration!
- Bobbin full
- What width are the seam/hem allowances eg 1cm, 1.5cm, 3cms
Check your sewing machine manual if you need help with tension or more advanced settings.
Generally, if your machine has been serviced and you are using light to normal weight fabrics you will not need to adjust the tension. With correct tension the top and bottom threads will sit flat on the top and bottom of the fabric, there will be no little loops if the setting is correct.
STEP #4: Write the steps to follow to get a good end result
Now you have decided what sewing projects to work on, set up your space and worked out the fabric, tools, equipment and habby needed for those projects, you need to have clear steps to follow to start and complete the tasks. I will refer to this as the assembly instructions. There are other terms like sewing instructions, garment construction and sequence of operations; you will start to recognise them for what they are.
By writing out your assembly instructions you may also pick up on extra tools or items you may need to complete the project. An example of this is do you have a safety pin to draw cord or tape through your drawstring bag channel. Little things like that can bring a halt to the project and cause frustration.
If one of your projects is to upcycle a jacket with new buttons you don’t need to write a set of assembly instructions. If you have a bag pattern with no assembly instructions write down the steps you will need to follow to complete the project.
I start with planning:
- the front and the work that needs to be done there first
- the back eg does it need darts, a zip
- how they join together
- lastly finishing off such as hems and buttons
Quick tip press at regular intervals!
The example I am giving here is for a 100% cotton drawstring shoe bag. Use ribbon or tape for the drawstring. There is no front or back and I am using an oblong piece of fabric folded in half so there is no seam on the bottom of the bag.
Optional for the drawstring is to thread elastic through, as it’s a shoe bag this will work. It also works as an underwear or small clothing items bag.
My assembly instructions for this are longer than normal as I am putting in explanations that I hope will help. You can write yours in simple numbered points.
Quick tip Among the tools available to sewists are pinking shears or a rotary cutter with a pinking blade.
Pinking blades will reduce the amount of fabric that frays on an unfinished seam. As this is a shoe bag I would accept pinking your seams as a way to finish them. However, my assembly instructions will be for a sewn finish!
Cutting out instructions
Included in these measurements is a 1cm seam allowance for the side seams
Cut a piece of fabric 70cms x 40cms
One meter of tape or ribbon.
If using elastic, the finished width of the channel is 38 cms so cut about 5-8cms shorter so it’s not too tight to put the items in.
Assembly instructions:
Note: For regular seam allowances I work with a 1cm seam allowance.
Sewing the side seams
- Finish the long edges of your fabric with an overlocker or zigzag stitch
- Fold fabric in half lengthwise making your folded size 35cms x 40cms
- Stitch the one of the 35cm side seams from top to bottom
- Stitch the other 35cm side seam to 5cms below the top. This will give you the opening needed to pull through the drawstring.
Maths note! You will stop sewing at 30cms stitching up from bottom to top. Leave a 2cm gap and stitch the last 3cms which comes to a total of 35cms. So much maths involved in sewing 😊
- Stitch the end 3cms of that seam (leaving the 2cm gap open for the drawstring)
- Press side seams open, including the last 3cms at the top of the one side. I hope my hand drawn sketch makes sense!

- Turn under 1cm fold around the top of the bag. I do not usually press this under before folding over and stitching the hem. This will give you a clean edge once hem is sewn.
- Turn over 2cms at the top and edge stitch the hem. You will see there is a hole on the right side of the bag to take your ribbon or tape through.
Threading through the tape
- Using a safety pin on one end of the tape to pull the tape through the channel. Stitch the tape together at the ends if you want to ensure it doesn’t pull back out!
Make notes on how long you think each step will take so you can plan the time you will set aside for the project. Perhaps then double it!! It’s amazing how much longer it can take than you think. It is rewarding to do the planning carefully so once you do set aside the time you are ready to go.
STEP #5: Hand sewing overview
I do want to mention hand sewing at this point. I know lots of people want to fly along on their machine to get the job done quickly, but often it’s quicker and easier to work with hand stitching. There is also something very soothing about hand sewing.

An example of this is a shoulder strap I recently shortened. While I unpicked and machine stitched up the new shoulder seam, it was quicker and easier to close the lining seam by hand. Yes, I did momentarily consider closing it by machine, but the process would probably have taken longer to think through than actually getting on with the hand sewing option!
Learning just a few basic hand sewing stitches will be a great help for your sewing life.
- Running stitch
- Backstitch
- Whip stitch (used on the should lining)
It is very cost effective to put together a small bag of hand sewing tools. (See blog – 3 questions on Learning How to Sew VS It’s Cheaper to Buy)
- A small pair of scissors
- Hand sewing needles
- Unpicker or seam ripper (get a good quality one!)
- Pins
- Find a set of multi coloured threads at your local supplier or start with the colours you most commonly wear. You could also raid a relative’s sewing room for any excess spools of thread they may have!
The great thing is your hand sewing kit gives you the opportunity to sew in a variety of places!
A well-placed hand stitch can help alter the fit of a garment that you thought would never work for you. Start with an easy project and in time you will be able to assess a garment and know how your skills will transform the way that item could look on you.
STEP #6: Fit, assess and adjust
Stop and assess your sewing as you go. You may need to do a garment fitting or unpick something before sewing any further. It’s easier to adjust as you go rather than waiting until all is completed.

If you have sewing instructions these will help. Keep your own notes as a log of what you found easy and what was hard; this will make the process easier for the next time. It could also highlight the skills you need to develop as a priority.
STEP #7: Finishing off the item and next steps
As you get to the end of the sewing project this is often where the hand sewing comes in. Will you sew on the buttons by hand or machine? What about the hem?
Pressing can make all the difference to your sewing and it’s worth setting up an ‘ironing station’ to make this a quick and easy process.
I do recommend pressing as you go. Sew the seams you can and then pressing them all before the next stage. Pressing ‘sets’ the stitches in and helps everything take shape.
I don’t tend to fold up and press hem allowances before I sew them for that reason; it sets the stitching in. Once I’m sure the hem is sewn at the right length, then I set and shape with pressing. I hope that makes sense 😊
Steps to take for future sewing projects are to assess:
- Was the fabric successful for the design?
- Did the pattern work as planned.
- What mistakes did you make that can be avoided in future?
- Do you need help with certain sewing components eg zips/pockets
- What was the most difficult part of the process?

What do you feel you can tackle now? Plan the next project and keep up the momentum. Think of the good you are doing for our planet by keeping items in circulation 😊. This is something to be proud of!
I hope this will inspire you to get some small sewing projects ready and start your mending and making projects. We would love to keep in touch and get to know what your sewing challenges are as well as your triumphs.
Follow us on:
https://www.facebook.com/LearnSewingOnline
https://www.instagram.com/learnsewingonline/
Click here to download my FREE Sewing Guide